Diy Tutorial
How to Build a Paver Patio: Plan the Base, Lay the Field, and Review the Material List
Plan a pedestrian paver patio from site review and system selection through excavation, base preparation, laying, joint filling, maintenance, and material-list reconciliation.
BuildListCalc Editorial Team · 14 min · Published August 3, 2026 · Updated August 23, 2026 · Fact checked August 1, 2026
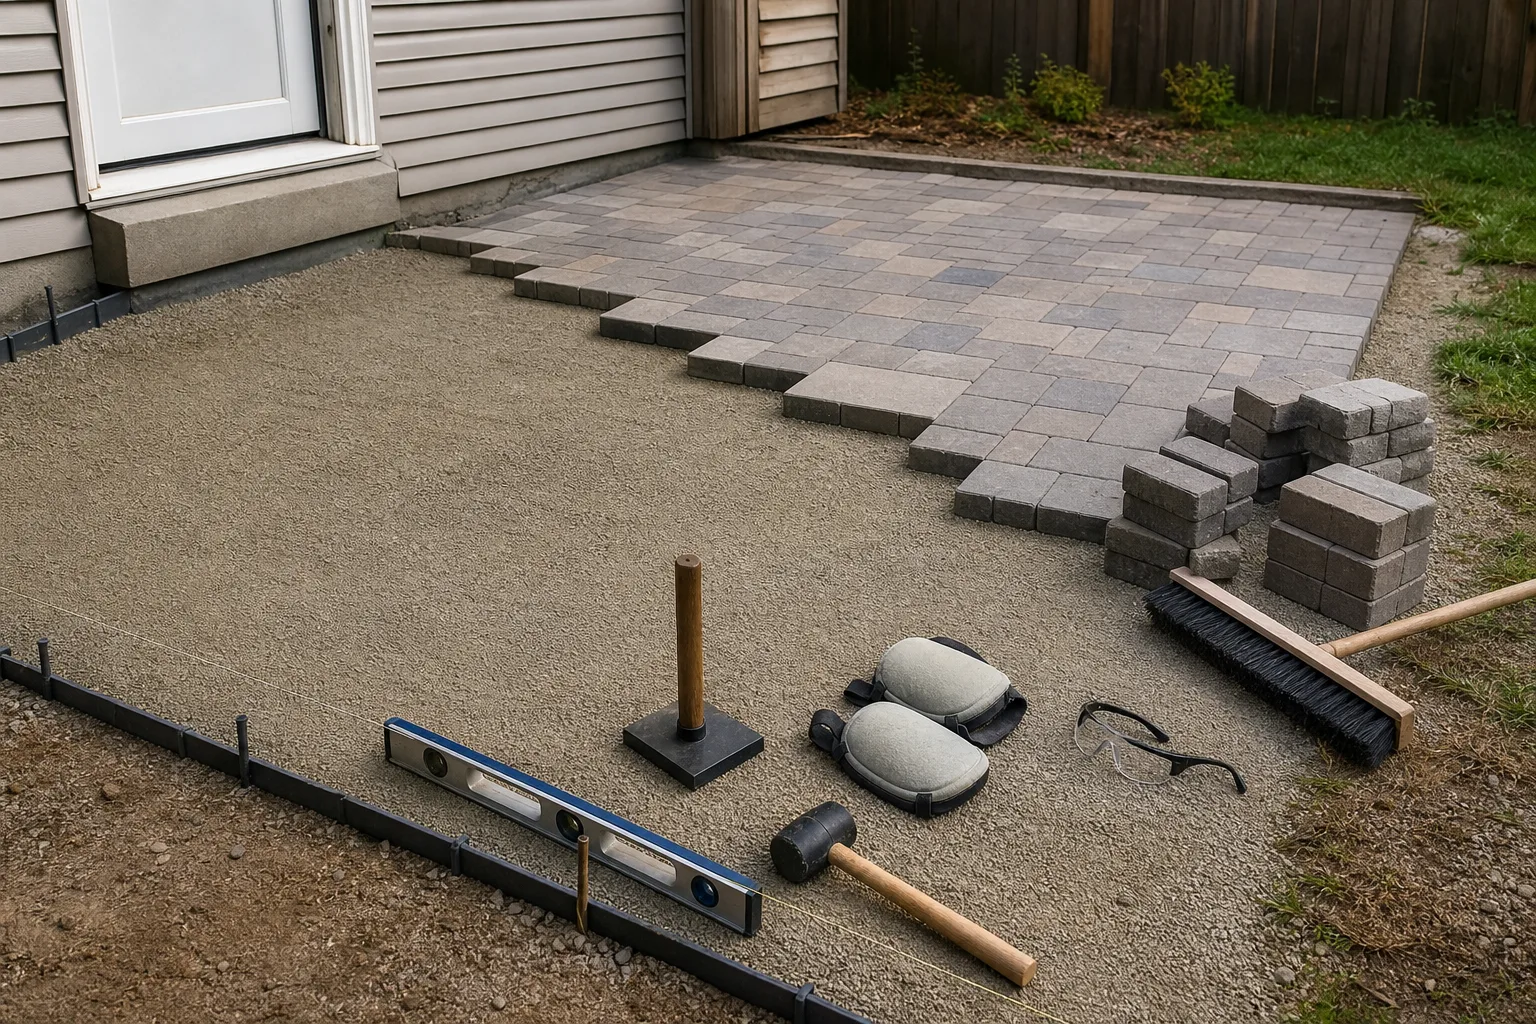
Decide what kind of patio you are building
Begin by naming the use, not by choosing a paver color. This tutorial covers a ground-level residential patio intended for people, chairs, tables, and ordinary backyard activity. A driveway, parking pad, commercial walk, pool structure, retaining edge, elevated platform, or surface carrying unusually heavy equipment is a different design problem. Move vehicle loads, weak or disturbed soils, walls that retain soil, complex drainage, and other high-consequence conditions to a qualified contractor or design professional before treating the work as a DIY patio.
Next, choose an assembly. A conventional sand-set interlocking concrete paver patio commonly combines pavers and sand-filled joints with a bedding layer over a compacted aggregate base. An open-graded assembly uses different aggregate behavior and drainage assumptions. A permeable interlocking concrete pavement is another defined system; it is not created simply by leaving wider gaps in ordinary pavers. Product shape, joint material, bedding, base, subgrade, drainage, edge restraint, and maintenance have to work as one documented system.
The Concrete Masonry and Hardscapes Association's 2025 aggregate-base guide specification describes pavers and bedding sand over a compacted aggregate base for a defined project specification. It also says the text must be edited by a qualified, licensed design professional for the specific project. Treat it as evidence of what a professional specification coordinates, not as a universal backyard recipe. That is why the numbers below are labelled by where they come from. Some are the calculator's own starting values, which you can see and change in the Patio Material Calculator. Some are common planning ranges. None of them is a code requirement, and your building department and soils decide the final figures.
CMHA's October 2025 open-graded FAQ says standard sand-set pavers over a dense-graded aggregate base with concrete-sand bedding remain the recommended assembly for most interlocking concrete pavement applications. It describes standard pavers over open-graded aggregate as an alternative with specific limitations, only for residential pedestrian projects such as patios, pool decks, sidewalks, and walkways—not commercial or vehicular applications. Even within that pedestrian scope, it calls for site-specific evaluation of soils, drainage, materials, loading, construction, and maintenance. Select the assembly only after those questions are answered.
Check utilities, permits, drainage, and thresholds first
Before a stake or shovel enters the ground, use 811 Before You Dig or the linked website for your state center. The national site asks the user to contact the appropriate state center, provide the project location and dig area, allow the required response process, confirm that utilities have responded, and dig carefully around marks. It does not create one waiting-time rule for every state. Follow the ticket, timing, mark-validity, tolerance-zone, and refresh rules supplied for the actual location, including rules for a homeowner working on private property.
Ask the local authority having jurisdiction which zoning, setback, easement, lot-coverage, impervious-surface, stormwater, accessibility, permit, and inspection rules apply. A low patio may be treated differently across municipalities, and adjacent doors, steps, pools, septic systems, protected trees, drainage easements, or property lines can change the review. Record the office, date, answer, and any drawing or inspection it requests. A supplier's installation sheet and a material calculator do not establish local approval.
Trace where water arrives and where it may leave. Include roof runoff, downspouts, neighboring grades, irrigation, low spots, existing hardscape, and soil that remains wet after storms. Water must not be trapped against the house or redirected toward a neighbor, foundation opening, stair, or vulnerable landscape area. If the drainage route requires an underdrain, infiltration design, outlet, retaining condition, or connection to a regulated system, obtain a site-specific design rather than inventing a detail during excavation.
Measure door sills, siding or stucco transitions, brick weeps, vents, steps, and adjoining pavements. Plan the finished elevation and every transition before calculating excavation. Keep moisture-sensitive building details and required clearances visible in the sketch. Do not select a universal patio slope from a generic article: the safe direction and elevation relationship depend on the building, surface system, local rules, accessible route, soil, and drainage destination. Resolve conflicting thresholds or a patio trapped between fixed elevations with the responsible local professional.
Lay out the footprint and finished elevation
Transfer the proposed footprint to the site with stakes and string or another removable layout method that does not disturb utility marks. Measure from verified control points rather than assuming a fence is the property line. Check length, width, diagonals, curves, notches, steps, and the edge that will receive restraint. Walk the outline with furniture clearances in mind. A simple rectangle usually reduces cutting; a decorative shape may add small pieces, wasted pavers, edge work, and layout risk. The calculator's drainage note is about 3/16 in to 1/4 in of fall per foot away from the house for pavers, and it keeps a 2 in to 4 in clearance band below siding, stucco screeds, and brick weeps as a planning checkpoint. Never plan a dead-flat surface.
Establish finished-elevation references at the house, doors, walk connections, and outer edge. The references should show the intended drainage direction without pretending that a taut string is a construction specification. Note the paver thickness and the planned bedding and base systems so excavation can be derived from the selected assembly. If field measurements reveal that the planned layers cannot fit below a threshold while preserving drainage and required clearances, stop and redesign the elevation instead of making one layer arbitrarily thin.
Choose the pattern and paver module before finalizing the footprint. Mark a control line that keeps the most visible field orderly and avoids fragile slivers at fixed edges. Dry-lay representative pavers to understand joint geometry, color variation, and cut locations. Running patterns, herringbone patterns, borders, and mixed sizes can change cutting and staging even when the finished area is unchanged. Use the current manufacturer layout and joint guidance for the exact product.
Record the measured footprint, perimeter requiring restraint, openings, excluded areas, and access route for deliveries. Keep a separate field sketch with elevations and drainage arrows; the Patio Material Calculator preview is a schematic planning model, not a grading plan or hardscape section. If the patio includes several zones or irregular boundaries, break the takeoff into understandable areas and verify that shared edges are not counted twice.
Evaluate the subgrade before choosing a base system
Subgrade is the soil or existing material that supports the patio assembly. Expose and evaluate it before locking the base system. Look for topsoil, roots, organic material, construction debris, loose fill, pumping or saturated soil, buried pavement, abrupt soil changes, and evidence of previous settlement. Ask how the area behaves after prolonged rain and through freeze-thaw seasons. A dry surface on one inspection day does not prove that the underlying soil drains or carries load consistently.
The system decision must respond to soil, water, frost exposure, anticipated pedestrian use, and the available outlet or infiltration path. Dense-graded and open-graded bases do not manage water in the same way. The EPA's permeable pavement overview explains that permeable surfaces can allow rain and snowmelt to pass into underlying soil and gravel, reducing runoff from the surface. EPA also labels that page general information, says it is no longer being updated, and directs readers to local resources. It is context for runoff and infiltration—not an installation specification for this patio.
Do not assume that an open-graded layer automatically creates a permeable patio. Standard pavers with sand-filled joints over open-graded aggregate are the hybrid addressed by the CMHA FAQ; a purpose-designed permeable pavement uses its own surface, joint, base, subbase, drainage, and maintenance criteria. Confirm whether infiltration is allowed and feasible at the site. Poorly draining or sensitive soils, high groundwater, contaminated ground, steep slopes, nearby foundations, and regulated stormwater conditions may require another approach.
Pause for qualified review when the exposed soil is weak, highly variable, expansive, organic, previously filled, persistently wet, eroded, or close to a retaining wall or foundation. The same applies if excavation reaches an unknown pipe, cable, drain, footing, buried slab, or unsuitable material. A thicker generic base is not a reliable cure for an unresolved soil or drainage condition. Document the finding, protect the excavation, and obtain a site-specific preparation decision.
Excavate and prepare the subgrade without trapping water
Plan excavation access, spoil storage, and weather before removing soil. Keep excavated material away from doorways, utility marks, tree protection, drainage paths, and the edge of the cut. Use tools and equipment appropriate to the site, and follow the utility center's instructions around marked facilities. Hand digging may still damage shallow private lines that the public locate process does not mark, such as irrigation, landscape lighting, or owner-installed wiring, so identify private utility responsibilities too.
Remove vegetation, organic soil, loose debris, and unsuitable material required by the accepted site plan. Shape the excavation from verified finished-elevation references, allowing for the selected paver, bedding, and base assembly without adopting generic layer dimensions. Avoid disturbing sound soil unnecessarily. If the bottom is over-excavated, do not hide the low area with loose soil or an arbitrary thick bedding layer; use the correction method accepted for the system.
Keep the prepared subgrade from becoming a basin. Maintain the intended water path and protect the excavation from roof runoff and storms while it is open. If water ponds, soil pumps underfoot, sidewalls collapse, or the surface becomes rutted by equipment, stop placing aggregate. Let the responsible contractor or professional determine whether drying, removal, stabilization, separation, drainage, or redesign is required. Covering an unstable condition only makes the failure harder to diagnose later.
Before base placement, recheck footprint, excavation edge, elevations, transitions, utility responses, and every observed soil condition. Remove loose material created by traffic. Photograph and record concealed conditions if appropriate, but do not substitute photographs for a required inspection. Confirm whether geotextile or another separation treatment belongs in the selected system and exactly where it goes; fabric is a product-specific and site-specific component, not an automatic cure for every soil.
Place and compact the aggregate base for the selected system
Order aggregate by the accepted system description, not by a vague request for gravel. A conventional sand-set assembly and the open-graded alternative discussed by CMHA use different gradations and water behavior. Confirm the material designation, source, cleanliness, moisture condition, delivery quantity, and compatibility with bedding and subgrade. Keep stockpiles separated from soil and debris. If delivered material does not match the approved description, resolve it before spreading. For a paver patio the Patio Material Calculator starts at a 6 in compacted base and accepts 4 in to 8 in in 1 in steps; its own reference notes describe 4 in to 6 in as a common range for light residential patios, and it flags a review when the modelled frost depth reaches 30 in while the base is still under 6 in. Deeper frost, soft clay, or any vehicle traffic pushes past that band, and only a local review settles it.
Place the base in the sequence and manageable layers required by the project specification and compaction equipment. Spread without rutting the subgrade or segregating aggregate. Compact every area, including edges and locations that larger equipment cannot reach. The CMHA open-graded FAQ emphasizes compaction to limit future settlement and support load distribution, but its verification recommendation belongs to that specific hybrid system. The Patio Material Calculator's own reference notes suggest compacting in roughly 2 in to 3 in lifts instead of dumping the full depth at once, because a thick single lift compacts only near the surface. Pass count, moisture, and any density or deflection target belong to the equipment you rent and the project specification, so confirm those with the supplier or a qualified professional rather than a national number.
Use the inspection or testing method selected for the job. For a straightforward pedestrian patio on suitable soil, that may be a contractor's documented process tied to the product and equipment. More uncertain soil, drainage, loading, or open-graded work can justify professional observation or testing. Soft spots, rocking aggregate, rutting, pumping, segregation, or elevations that cannot be reconciled are stop signs. Do not compensate with bedding sand, which is for setting pavers rather than correcting a failed base.
Recheck the base surface against control lines, transitions, and the planned bedding and paver thickness. Confirm that water will not be trapped at the house or within an assembly that lacks a designed outlet. Protect the compacted surface from contamination and construction traffic. Install any drainage or side containment that the accepted system requires before it becomes inaccessible, and preserve evidence needed for a local inspection or professional review.
Screed the bedding layer and stage the pavers
Use the bedding material required by the selected paver system. Conventional sand-set work typically relies on a compatible concrete-sand setting bed; an open-graded or permeable assembly may specify a different material and sequence. Do not swap materials because they look similar in a pile. Confirm gradation, moisture handling, maximum storage time if relevant, and compatibility with the paver and joint product documents. The calculator assumes a 1 in screeded bedding layer of washed concrete sand — not stone dust or masonry sand — and does not use bedding sand to correct a weak base.
Screed only an area that can be covered without walking through, contaminating, drying unevenly, or disturbing the prepared surface. Use rails or another accepted method to maintain the planned plane, then remove and fill their paths as the system requires. Bedding is not a leveling course for deep corrections. When the screeded plane reveals a base high spot, low spot, or drainage conflict, correct the base rather than burying the defect.
Stage pavers near the work without overloading or damaging the prepared base. Verify product name, thickness, size, color, finish, lot information, and quantity before installation. Blend units from multiple pallets when the manufacturer recommends it so natural color variation is distributed. Set aside damaged or contaminated pieces. Keep pallets, cutting, and delivery equipment clear of fragile thresholds, finished work, and underground facilities.
Reestablish the control line and dry-check the pattern before committing a large field. Confirm joint orientation, borders, intersections, and how the pattern meets doors, steps, drains, and fixed paving. The bedding surface should remain clean and undisturbed ahead of the laying face. If weather or access will interrupt work, end at a stable line and protect the exposed preparation rather than leaving it vulnerable to runoff or foot traffic.
Lay, cut, and restrain the field
Place pavers from the established control, using the product's joint and laying guidance. Work from the installed field where the method permits, not from the unprotected bedding. Check alignment frequently across several rows instead of forcing the last edge to absorb accumulated error. Keep the surface plane consistent while recognizing that the accepted drainage layout, transitions, and accessibility conditions control the finished elevation.
Make cuts with equipment suited to the paver material and the manufacturer's safety directions. Control silica-containing dust with the required method, personal protective equipment, and work-zone separation. Avoid tiny pieces at high-traffic edges when the layout can be adjusted. A cut next to a wall, door, step, drain, or curved boundary must still leave the movement, drainage, and edge condition required by the selected system.
Provide stable edge restraint wherever the system needs lateral support. Match the restraint, fasteners or anchorage, base condition, curves, and exposure to the manufacturer's detail. The open-graded hybrid FAQ specifically stresses an edge able to resist lateral spreading, but that statement does not select one universal restraint for all patios. A pavement edge that retains soil, carries a height difference, borders a steep drop, or interacts with a foundation is more than a routine plastic or metal edging decision and needs qualified review.
Before closing the field, inspect pattern, alignment, rocking units, damaged corners, narrow cuts, thresholds, steps, drains, and restraint continuity. Keep debris out of joints and replace questionable units while access is easy. Do not conceal a base movement or elevation error by hammering individual pavers into an uneven bedding layer. Correct the responsible layer and reestablish the plane.
Fill joints, compact, inspect, and plan maintenance
Use the joint material specified for the exact paver and assembly. Ordinary joint sand, polymeric sand, and aggregate used in permeable systems are not interchangeable. Check joint width, surface dryness, weather window, cleaning, activation, compaction, and cure restrictions in the current product instructions. Protect adjacent walls, drains, planting, and finished surfaces. A bag label for one joint product does not validate the underlying base or drainage system.
Compact or seat the completed surface with the equipment, protective mat, sequence, and number of cycles required by the system and paver producer. Refill joints as required during that process. Stop if units crack, shift excessively, settle unevenly, or damage appears at edges. Final compaction cannot repair unstable soil, an uncompactable base, incompatible bedding, missing restraint, or a trapped-water condition.
Inspect the patio during dry conditions and after rain. Check transitions, surface movement, ponding, washout, edge spread, joint loss, settlement, heaving, rutting, and water near the building. The CMHA open-graded FAQ warns that joint sand can migrate into the aggregate below and calls for monitoring and replenishment as part of that system's maintenance. Follow its current system guidance and the joint-product instructions rather than applying that behavior to every patio.
Create a maintenance record with product names, lots, receipts, photos, system documents, and the date of each inspection or repair. Keep joints, edges, outlets, and adjacent drainage paths functional. Address movement or persistent water early. If failure suggests soil, drainage, retaining, or utility movement, obtain qualified review before relaying the surface. The EPA runoff discussion supports thinking about infiltration and runoff over the life of the site, but it is not a maintenance specification and explicitly may not be current.
Reconcile the work with the Patio Material Calculator material list
Open the Patio Material Calculator and select the paver path, the actual footprint mode, dimensions, pattern, waste choice, edge type, geotextile decision, joint-sand choice, and optional sealer scope. Its paver material list can include base gravel, geotextile, bedding sand, pavers, edge restraint, spikes, polymeric joint sand, and sealer according to current inputs. The preview and quantities are planning tools; they are not a grading plan, compaction sequence, approved section, or supplier order. Two conversions explain most of the ordering questions: base gravel is converted at about 1.40 tons per cubic yard, and excavation is reported as bank volume plus a nominal 20% swell for haul-off. Paver waste follows the pattern you pick — about 8% for straight lay or running bond, 12% for diagonal, and 14% for herringbone — because edge cutting rises with the pattern.
Compare every row with the field-selected system. The calculator does not turn its generic paver path into a complete open-graded or permeable pavement specification. If the responsible design uses one of those systems, reconcile or replace the aggregate, bedding, geotextile, drainage, joint, edge, and maintenance assumptions with the project documents. Do not preserve a calculator row merely to keep the total unchanged. Likewise, a deselected row is not proof that the material is unnecessary on the actual site.
Verify measured area, restrained perimeter, paver unit or package coverage, pattern waste, aggregate supply unit, bedding supply, fabric roll coverage, restraint section length, fastener pack count, joint-product coverage, color lot, delivery access, and compatible optional finish. Distinguish installed coverage from purchase quantity and round only according to the supplier's packaging. Keep review-first lines unresolved until a current product, pack, and supply method are confirmed.
Finally, separate the material takeoff from the complete project decision. Labor, excavation surprises, disposal, delivery, tax, equipment, permits, inspections, drainage design, soil correction, professional services, and contractor overhead remain outside the material list unless quoted separately. Save a version that matches the final field sketch, attach the source and product documents, and rerun the calculator when geometry, system, site condition, or packaging changes. The responsible handoff is a reconciled planning list plus open questions—not a calculator total presented as construction approval.