Diy Tutorial
How to Plan and Build a Residential Fence: Property Lines, Utilities, Posts, Gates, and Hardware
Plan a residential wood fence from property and utility review through route measurement, posts, rails, pickets, gates, hardware, inspection, and material-list reconciliation.
BuildListCalc Editorial Team · 15 min · Published August 3, 2026 · Updated August 23, 2026 · Fact checked August 1, 2026
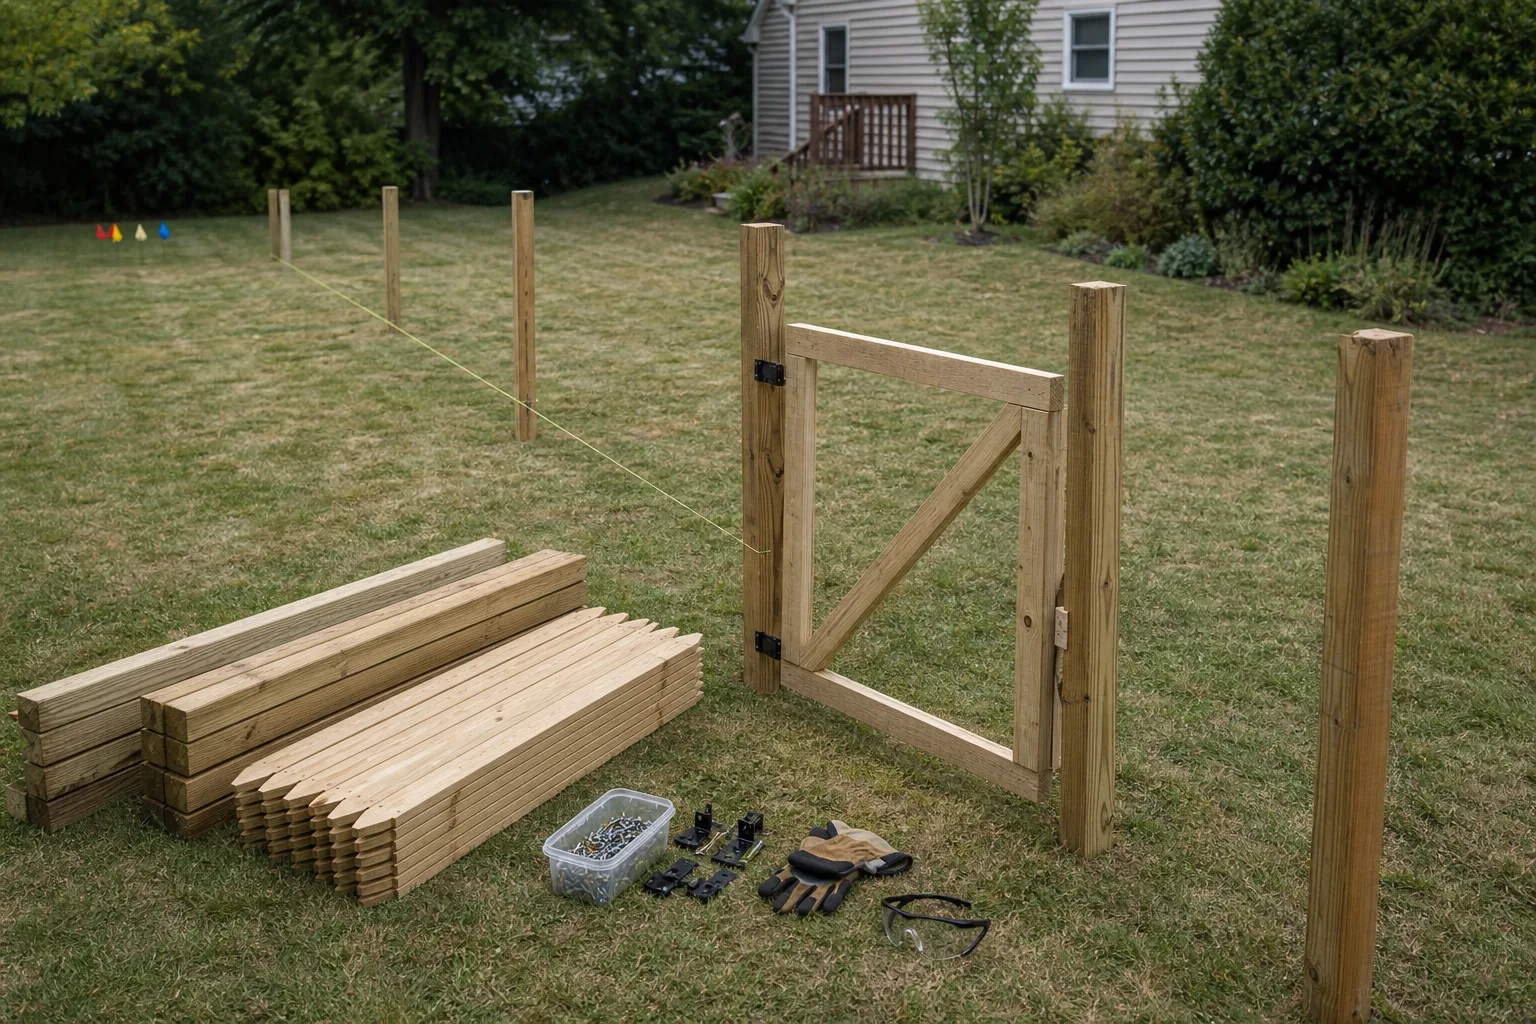
Define the fence job before choosing materials
Start by describing the boundary problem the fence must solve. Is the goal privacy, a visible yard edge, controlled access, wind screening, pet management, or a background for planting? Record which sides of the yard are included, where the run starts and stops, whether it turns, how grade changes, and which openings must remain usable. A residential fence beside a pool, on a retaining condition, near a street sight triangle, or serving an unusual wind exposure can require a different review path from an ordinary backyard wood fence. Do not let a favorite picket profile decide the route before those conditions are known.
This tutorial covers planning and ordinary field sequencing for a residential wood fence. It is not a survey, legal boundary determination, zoning decision, engineered wind design, retaining-wall design, permit set, manufacturer-approved assembly, or inspection result. Move masonry, concrete, chain-link, proprietary composite or metal systems, pool barriers, major retaining conditions, unstable slopes, and other unfamiliar work to the appropriate local authority, contractor, manufacturer, surveyor, or design professional. A material list can help organize a wood-fence project, but it cannot authorize land use or establish ownership.
Write a short scope statement before measuring: purpose, material family, approximate height, route, gate use, expected exposure, finish, and known exclusions. Treat neighbor access, utility easements, association rules, and possible connections to an existing wall or post as separate decisions. Use the scope to question the local office, utility center, supplier, and installer.
Open the Fence Material Calculator only after that first scope pass. Its current wood-fence path organizes length, height, section width, wind exposure, straight-run or corner-return planning, slope and end conditions, post and hole choices, rails, picket style, gate openings, and regional context. Those inputs drive a planning BOM and schematic preview. They do not decide where a lawful fence may go or prove that the selected members and connections are suitable for the site.
Verify property lines, easements, and neighbor access
Do not use an existing fence, mowing line, hedge, curb, utility flag, tax-map image, or online parcel overlay as proof of the property line. Gather the deed, recorded plat, prior survey, title documents, easement records, and any corner information available for the property. Compare them with visible field evidence, but do not move a marker or invent a boundary from one measurement. When the line or corner cannot be located confidently, engage a qualified land surveyor before setting posts. The cost of rework is small compared with a fence built on land the owner does not control.
Map every recorded easement and any access, drainage, utility, shared-drive, alley, or maintenance right that may cross the route. Ownership of the ground does not automatically mean a fence can block an easement. Ask the easement holder and the local authority what access must remain and what documentation is required. If a utility, drainage feature, wall, or shared structure sits close to the route, mark the unresolved zone on the field sketch and keep posts out until the responsible party answers.
The City of Reno's Residential Fence Permit Guidelines, updated July 1, 2025, are a useful local example of plan-content expectations. Reno says surveys are suggested but not required for its submittal and asks plans to show items such as fence-segment location and length, gate location and width, property lines, existing structures, fence height and material, and easements. That is Reno guidance, not a national statement that a survey is optional everywhere or that those items are enough for another jurisdiction.
Discuss access and sequencing with affected neighbors without treating a conversation as a boundary decision. Obtain written permission before entering neighboring property, removing shared vegetation, detaching an existing fence, or staging materials outside the owner's land. Confirm who maintains the finished side and how temporary openings will be secured. Keep survey, zoning, title, and permit questions with the qualified parties that control them.
Check utilities, zoning, permits, and visibility rules
Before any stake, probe, auger, or shovel disturbs soil, use 811 Before You Dig or the linked website for the project's state center. The national service specifically lists installing fences as a common project that requires contact. Supply the actual address, county, cross street, project type, and dig area; then follow the state center's ticket timing, response, mark-validity, tolerance-zone, refresh, and safe-digging instructions. Confirm that every notified utility has responded before breaking ground. The national page's general “few days” wording is not one legal waiting period for every state.
Ask the state center and property owner how private or customer-owned lines are handled. Irrigation, landscape lighting, private electric service, outbuilding feeds, drains, propane lines, septic components, and other owner-side facilities may need separate records or locating. Preserve all marks and flags. If a proposed post conflicts with a marked facility, stop and coordinate relocation of the fence or a utility decision; do not shift a mark, expose a line casually, or assume a hand tool makes the conflict harmless.
Contact the local planning or building office for the actual parcel. Ask about fence type and material, height measurement, front/side/rear placement, setbacks, corner-lot and driveway visibility, public right of way, easements, overlays, historic or design review, flood or environmental constraints, permit type, plan content, inspections, finished-side rules, pools, and association prerequisites. Get the answer for the specific address and record the office, date, staff response, and documents consulted.
Local examples show why national shortcuts are unsafe. Raleigh's Fences page, updated July 14, 2026, says its residential work requires local permits when adding or moving a fence or replacing 50% or more, and it also identifies local zoning-permit triggers for certain smaller replacements that change material, height, or location. Raleigh asks for a fence diagram and site plan and adds street-related review in particular locations. These are Raleigh procedures only.
Portland's Fence Residential Building Permits page provides a different local example. It lists building-permit thresholds of over 7 ft for wood, over 4 ft for masonry or concrete, and over 8 ft for woven wire or chain link, while pool barriers require permits. It also says setback requirements vary by residential zone, explains property-line and right-of-way context, and notes that some fences need Oregon engineering. None of those Portland numbers establishes a rule outside Portland. The correct conclusion is to verify the current local rule, not to select the most convenient city's threshold.
Walk and measure the complete fence route
Walk the proposed route from both directions with the field sketch in hand. Mark verified control points, but keep temporary layout distinct from property and utility marks. Record each straight segment, outside turn, change of direction, grade break, terminal condition, gate opening, nearby structure, tree, hydrant, drain, utility response area, and access constraint. Look above as well as below: branches, service drops, roof edges, and future maintenance routes can matter even when they do not appear in a plan view.
Measure the route segment by segment rather than recording only one total. Check offsets from verified property controls and local setback references. Where a run turns, record the field angle and both legs instead of assuming every corner is square. Where grade changes, record the high and low conditions and decide whether the concept uses stepped panels, follows grade, or needs redesign. A steep slope, retaining edge, eroding soil, or abrupt drop can move the work outside an ordinary DIY fence even if the total length is modest.
Lay out gates as openings, not decorations added after sections are divided. Measure the required clear passage, swing area, latch approach, adjacent grades, vehicle or equipment access, and how the gate meets end or corner posts. Check for conflicts with steps, downspouts, meters, trash bins, air-conditioning equipment, and drainage. A pair of leaves, a wide opening, a pool gate, or an accessible route needs its own hardware and clearance review; the calculator's standard single-swing allowance cannot settle those details.
Close the measurement loop. Rewalk the route, compare segment totals with the overall dimension, and photograph control points without treating photos as a survey. Date the sketch so later property, permit, gate, or utility changes do not get mixed with the earlier takeoff. The estimate should point to one identified field version.
Choose a fence system for privacy, wind, and maintenance
Choose a complete material and attachment family rather than mixing whatever looks similar at the store. For a wood fence, identify post treatment and use category, rail and picket species or treatment, fastener and connector compatibility, cut-end treatment, finish system, and gate hardware. Confirm actual sizes, stock lengths, moisture condition, coating compatibility, corrosion exposure, and current installation documents. Nominal lumber names do not replace the actual dimensions used for spacing and quantities. The Fence Material Calculator starts at a 6 ft fence in 8 ft sections with 3 rails. Pick the high-wind exposure and it caps sections at 6 ft, which adds posts across the same run. It also holds rails at 3 once the fence reaches 6 ft, matching the common rule of a rail about every 24 in of height. Fences over 7 ft usually pull in permit, zoning, or engineering review, so confirm that height with your local office before ordering.
Balance privacy with wind and maintenance. A solid privacy field presents different wind behavior from an open picket field, and a taller or more exposed run may need site-specific post, footing, spacing, and connection decisions. Do not assume that adding concrete or using a larger post solves every wind problem. Fence height, openness, terrain, soil, frost, gate loads, post restraint, and connection load path interact. Use a qualified design path when local rules, severe exposure, tall work, unusual soil, or observed movement warrants it.
The Fence Material Calculator includes Standard residential and High wind / fully exposed planning paths. In its current model, selecting high wind reduces a requested 8 ft section width to a 6 ft effective planning width. That is a conservative calculator adjustment, not a national spacing requirement or structural approval. Enter the exposure honestly, then replace the calculator assumption with the locally reviewed design when one is required.
Decide how the fence will be maintained before finalizing the face and finish. Provide access for coating, vegetation control, fastener inspection, gate adjustment, and replacement. Keep soil, mulch, and chronic irrigation away from vulnerable wood where required. Follow current supplier instructions for drying, preparation, cut ends, compatible metals, application weather, and recoating.
Lay out line, corner, end, and gate posts
Transfer the accepted route to the ground without disturbing utility marks. Use string line, offset stakes, batter boards, or another removable control method appropriate to the site. Mark every post by role: line, end, corner, gate hinge, or gate latch. Do not let equal spacing drift a terminal post across a setback or a gate into a utility zone. Where the route is close to a legal boundary, preserve the survey controls and use the verified offset, not the string alone, to confirm each location. The calculator puts two posts on every gate and upgrades gate posts to 6x6 once an opening passes 4 ft, because a wider leaf loads the hinge post harder. Gate openings come out of the run, so a 4 ft gate can erase a section.
Divide straight runs from fixed points outward. Plan full sections where practical, then locate the partial section deliberately instead of allowing a narrow remainder to appear at a gate or corner. Keep rail stock, joint staggering, picket rhythm, and gate framing in view while adjusting bays. If actual conditions make a planned section impossible, revise the sketch and takeoff before digging. A calculator remainder is a prompt for field layout, not permission to squeeze a member into the leftover space.
Treat corners and returns as field geometry. The current Fence Material Calculator's corner-return mode adds conservative post, rail, picket, and concrete allowances using the entered corner count, return-leg length, angle profile, and post layout. It does not locate the legal corner, determine the true angle, choose a backing or nailer detail, or create permit drawings. Boxed privacy corners, open angles, house returns, and structural tie-ins need an explicit buildable detail and a receiving structure suitable for the attachment.
Gate posts deserve their own decision. Confirm leaf type, clear opening, swing, hinge side, latch side, grade clearance, anti-sag strategy, stop, drop rod or paired-leaf sequence when relevant, hardware load, and post support. The calculator separates gate posts from line/end posts and may use a more conservative gate-post allowance for wider openings, but it does not select final hinges, reinforcement, or latch clearances. Dry-check the gate geometry at the marked posts before excavation begins.
Plan holes, concrete, drainage, and treated-wood exposure
Resolve the footing detail before opening the ground. Post-hole diameter, depth, shape, base condition, post embedment or elevated connection, frost response, concrete or other backfill, inspection timing, and drainage treatment depend on the accepted local and system design. Entering a diameter and depth in a material calculator does not make them suitable for the soil, height, wind, or jurisdiction. Where the local office requires an inspection before concrete, keep the work visible and follow its sequence. Numbers you can act on, with their source. The calculator opens at a 12 in hole and 36 in of depth, and it will not go below 10 in of diameter for 4x4 posts or 14 in for 6x6; its own reference notes give 10 in to 12 in as the common range for 4x4 and 14 in up to 16 in or 18 in for 6x6. For depth it takes whichever is deepest: your entry, the modelled local frost depth, or one third of the post height with a 24 in floor. Post stock is sized as fence height plus hole depth plus about 6 in of trim, rounded up to an even length. Concrete is counted as 80 lb bags at roughly 45 bags per cubic yard, after subtracting the buried post from each hole. Every one of those is a planning figure, not a code minimum. Frost depth and required embedment are set where you build, so confirm them with your building department before you dig.
Plan excavation safety and spoil handling. Keep people away from open holes, protect the route from falls and collapse, and stop when soil sloughs, water enters, an unknown object appears, or a utility conflict is exposed. Do not leave hazardous holes open for the sake of production speed. Coordinate weather, concrete delivery or bag staging, access, and temporary protection so each post can be set and stabilized under the accepted procedure.
The Fence Material Calculator calculates its concrete BOM from the net modeled hole volume after subtracting embedded post displacement and expresses the result as current 80 lb bag allowances with waste. It can increase the planning depth when its regional frost fallback or height-related internal floor exceeds the entered depth. Those are transparent estimator behaviors, not site approval. Verify the final footing geometry, bag yield, mix, placement, cure, and quantity with local requirements, the design, and current product instructions.
Manage water at the finished post. The chosen detail should avoid creating a persistent water trap at wood and should direct surface water according to the accepted site plan. Do not universalize one gravel-base, crowned-concrete, sleeve, sealant, or post-treatment detail across all soils and products. Confirm ground-contact rating, field-cut treatment, concrete contact, above-grade exposure, and incompatible chemical or metal conditions with current product documentation. If drainage, frost, decay, or expansive soil remains unresolved, pause the material order and obtain qualified review.
Build rails, pickets, gates, and compatible hardware
Build only after the accepted posts have reached the required stability. Recheck post line, spacing, plumb, elevation, corner geometry, and gate opening before cutting rails. Lay out rail joints so they are supported and do not all stack at one location unless the reviewed detail calls for it. Follow the chosen system for rail orientation, end treatment, fastener edge distance, connector placement, and movement. Do not copy a universal connection from a generic illustration. Pickets are 3.5 in or 5.5 in actual width, and the gap choices run from 0 in for a tight privacy start up to 1 in. Flat-top privacy runs are counted tight, so an entered gap stays an install note rather than removing pickets. For fasteners the calculator assumes 2 at each picket-to-rail intersection, which is 6 per picket on a 3-rail fence, and its notes suggest 1-5/8 in to 1-3/4 in exterior-coated or stainless screws for pickets and 3 in to 3-1/2 in for rail-to-post connections.
Sort pickets by actual width, straightness, damage, and moisture. Establish a consistent top, bottom, or grade reference appropriate to the selected design. Check the planned gap against privacy, drying, movement, pet containment, pool rules if applicable, and product behavior. The calculator's classic privacy path may count a tight-start layout even when an entered gap remains an installation note, while dog-ear/opener layouts use actual width and gap differently. Reconcile that model with the boards actually delivered before fastening a full run.
Use fasteners and connectors compatible with the wood treatment, species, exposure, coating, and each other. Confirm length, diameter, head, shank, corrosion resistance, installation tool, and package coverage from current manufacturer information. The Fence Material Calculator's hardware boxes and exterior-fastener boxes are conservative allowances rather than a screw-by-screw connection schedule. A line item with a price and retailer link still requires product identity, pack count, treatment compatibility, and availability review.
Assemble and hang the gate using the selected hardware instructions and accepted support detail. Check diagonal bracing or anti-sag strategy, hinge axis, latch alignment, stops, clearances, and movement through the full swing. Keep hands and body clear during lifting, brace the leaf safely, and use enough people or equipment for its weight. Multiple leaves, self-closing or self-latching requirements, pool barriers, automated operators, and unusual access are separate scopes that require their applicable local and product review.
Inspect alignment, movement, clearances, and finish
Inspect progressively instead of waiting for the final picket. After posts, verify route, offsets, line, plumb, elevations, footing condition, and required inspection evidence. After rails, look for unsupported joints, split ends, uneven bays, loose connections, and accumulating alignment error. During pickets, check top and bottom references, gap consistency, fastener seating, damaged boards, and clearance from soil or hardscape according to the system. Correct the responsible layer rather than hiding an error with the next one.
Operate every gate repeatedly. Check swing, latch engagement, hinge movement, sag, stop contact, ground clearance, pedestrian approach, and access from both sides. Recheck after the wood changes moisture and after early weather. A gate that moves freely on installation day can still reveal weak support or incompatible hardware. Keep adjustment access available and document the hardware so replacements can match the original system.
Walk the neighboring and street-facing sides where access is authorized. Look for exposed sharp points, protruding fasteners, unsafe climbable conditions where regulated, visibility conflicts, drainage obstruction, damage to utility marks or facilities, and encroachment beyond the verified route. Confirm that easement access, meters, hydrants, and required clear areas remain usable under the local decision. Do not infer final acceptance from appearance; complete every required local inspection and correction path.
Finish according to the current product documents and actual moisture/weather conditions. Protect adjacent property, plants, paving, hardware, and people during preparation and application. Record products, colors, batches, application date, and maintenance guidance. Schedule follow-up checks for post movement, rail or picket distortion, coating failure, corrosion, vegetation, drainage, and gate adjustment. Escalate unexplained movement, settlement, utility damage, boundary conflict, or structural distress rather than treating it as routine cosmetic maintenance.
Reconcile the field plan with the Fence Material Calculator list
Return to the Fence Material Calculator with the dated field sketch and accepted decisions. Enter the complete run, height, section width, wind exposure, straight-run or corner-return mode, slope and end condition, post and hole choices, rails, picket style and actual width, gate count and opening width, gate-post choice, and supported region where applicable. The current calculator subtracts gate openings from the effective fence run, separates gate posts, and groups posts, concrete, rails, field and gate pickets, connection hardware, exterior fasteners, and gate hardware in the BOM.
Compare each metric and preview cue with the field plan. Confirm full and partial sections, corner and slope allowances, end conditions, gate openings, post roles, and regional fallback. The two-dimensional and three-dimensional views are schematic planning aids. They may condense visible pickets and represent turns or layers symbolically; they do not show one-to-one member placement, a surveyed boundary, exact grade, legal setbacks, a reviewed connection, or permit geometry.
Audit every BOM row before ordering. Verify material family, treatment, actual and nominal sizes, stock length, installed quantity, waste, purchase quantity, package coverage, price date, region, supplier link, and notes. Replace calculator defaults with the accepted design and current supplier/product facts. Separate shopping-ready rows from estimate-only or review-first rows. Taxes, delivery, labor, equipment, demolition, disposal, vegetation work, survey, permit fees, inspections, utility work, engineering, and contractor overhead remain outside the material subtotal unless separately quoted.
Finally, preserve the open questions beside the list. Attach the property and easement basis, utility ticket and responses, local office record, accepted plan or sketch, product documents, gate schedule, inspection needs, and neighbor-access permission. Rerun the calculator when geometry, member choices, hardware, packages, or site conditions change. A responsible handoff is a reconciled planning BOM plus the unresolved decisions and source records—not a calculator total presented as authority to build.