Diy Tutorial
How to Plan an Outdoor Kitchen Before You Buy Appliances: Clearances, Noncombustible Assemblies, Utilities, and Review Gates
Plan the support pad, noncombustible shell, appliance openings, countertop, utilities, and review handoffs before buying equipment or fabricating the island.
BuildListCalc Editorial Team · 11 min · Published August 23, 2026 · Updated August 23, 2026 · Fact checked August 11, 2026
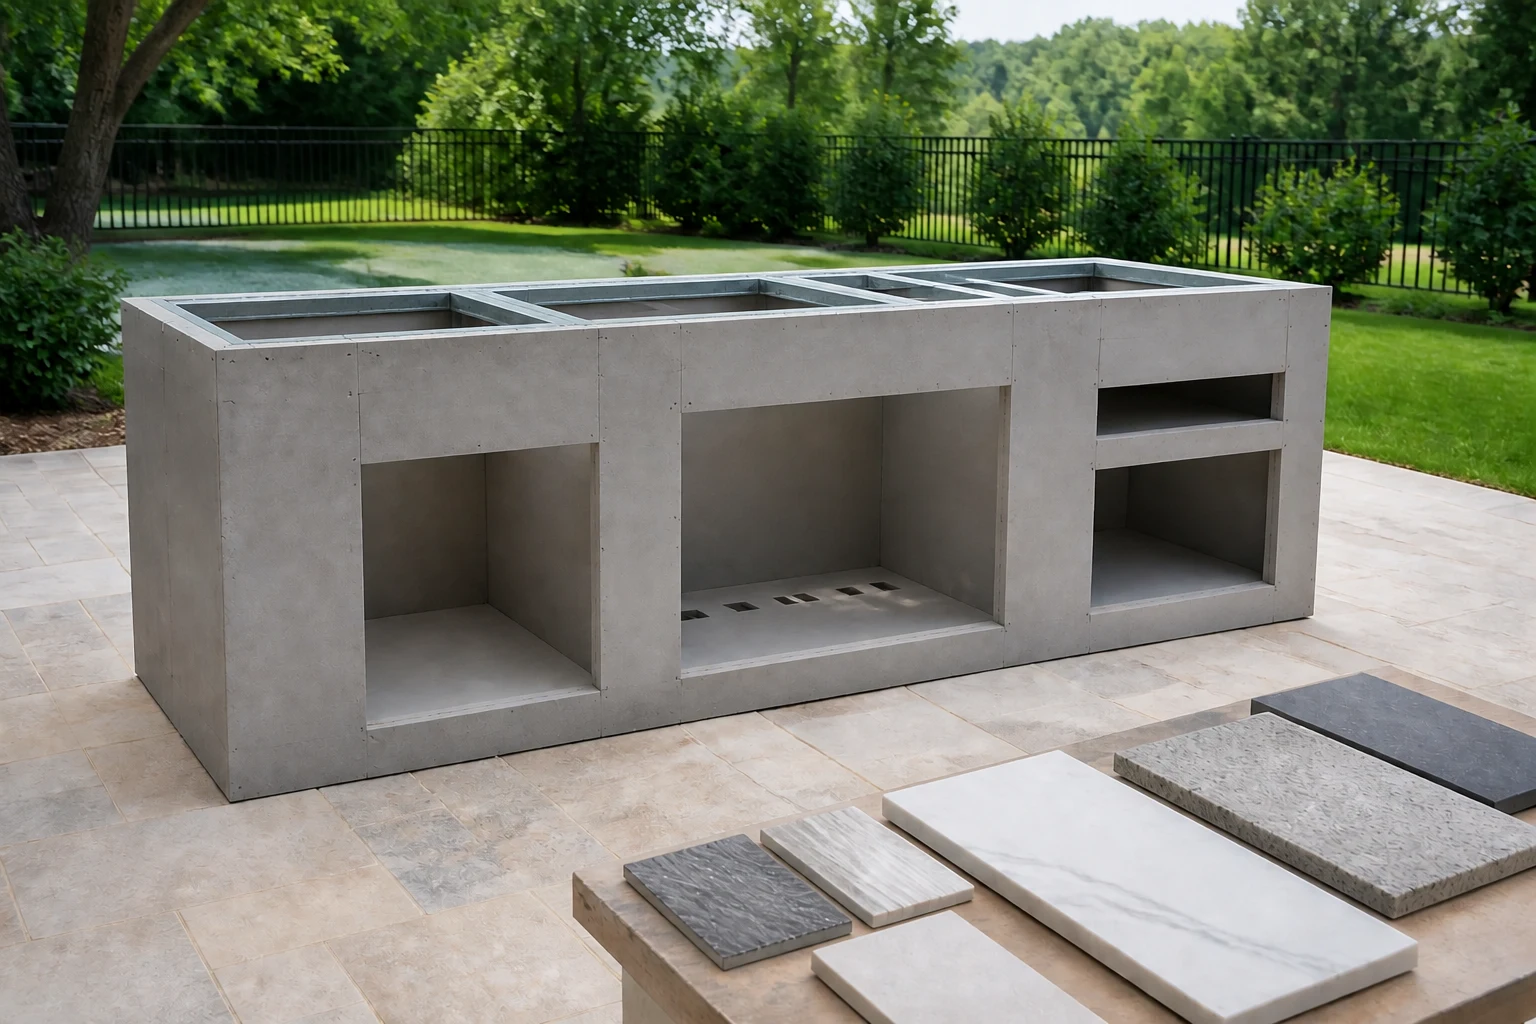
Define the outdoor kitchen before choosing appliances
Begin with the work the island must support, not a catalog page. List cooking, preparation, serving, storage, cleanup, seating, and seasonal shutdown needs. Mark which items are essential and which are alternates. A grill, sink, and mini-fridge change openings and review questions in different ways, so keep each option visible until the whole package is reconciled.
Sketch the island length, depth, counter height, working sides, guest side, access panels, and traffic direction. Record existing walls, roof edges, eaves, doors, windows, railings, vegetation, and property constraints. This is a planning sketch, not a permit set or installation detail. A local authority, responsible design professional, fabricator, and licensed trades may require changes after reviewing the actual site and selected equipment.
Use the Outdoor Kitchen Material Calculator to compare one coherent planning state at a time. The calculator estimates a support-pad path, noncombustible shell, facade, countertop, modeled openings, and review lines. It does not select appliances, design utilities, approve structural support, or certify clearances. Save alternate layouts separately so quantities from one scheme are not mixed with another.
Write a decision log beside the model. For every unresolved item, name the document or reviewer that owns it: current appliance instructions, fabricator requirements, utility locator response, licensed gas or electrical trade, local authority, or project professional. That log prevents a provisiona la calculadora input from becoming an accidental field instruction.
Check the site, traffic path, drainage, and excavation limits
Walk the proposed route from the house to the island and around every working side. Look for door swings, steps, narrow passages, pool barriers, seating conflicts, and places where a cook would cross guest traffic. Observe roof runoff, low spots, irrigation, soft soil, existing pavement movement, and where water could collect against the island. The layout should remain usable without treating a screen sketch as site approval.
Before breaking ground, use the applicable state 811 process to request marking of approximate buried utility locations and confirm the responses required for the site. The 811 before-you-dig resource routes users to state-specific procedures. It does not create a universal wait, guarantee that every facility is marked, define safe excavation clearance, or replace private-utility locating, local requirements, or professional judgment.
Record what must remain accessible: cleanouts, valves, panels, drains, irrigation controls, and future service paths. Photograph existing conditions without exposing private account or location data. If excavation could affect a building, retaining condition, slope, easement, tree roots, drainage system, or unknown utility, pause quantity planning and obtain the appropriate site review.
Treat drainage and frost behavior as design inputs, not a bag-count adjustment. The calculator can estimate materials for a selected pad path, but it cannot determine bearing, settlement, reinforcement, frost protection, grading, or stormwater compliance. Resolve those matters before using its quantities for purchase.
Choose the support-pad path without treating it as foundation approval
The calculator offers an existing slab, a new concrete slab, or a paver pad. Select the path that describes the current planning concept. Do not choose an existing slab merely to remove base and concrete quantities; confirm its condition, slope, thickness, support, cracking, drainage, and suitability with the responsible reviewer. Existing does not mean adequate.
The new-slab path activates planning inputs for base and slab thickness. Those fields estimate material demand within the calculator; they do not establish a structural section, reinforcement plan, frost solution, edge detail, joint layout, or utility sleeve design. A professional and local authority must determine the site-specific assembly. Coordinate penetrations before placement because later cutting can conflict with reinforcement, moisture control, or embedded services.
The paver path activates base and paver choices for a modeled surface. It does not approve an island foundation on loose or moving units. Confirm how the island loads transfer, how settlement is controlled, how drainage works, and whether an independent support is required. Keep the walking surface and the load-supporting assembly conceptually separate until a reviewer joins them.
Whichever path you model, verify finished elevations against doors, drainage, countertop height, appliance ventilation, and access panels. Keep grading, excavation, hauling, compaction testing, forms, reinforcement, joints, permits, inspections, and labor outside the calculator subtotal unless a returned line explicitly includes them. Obtain a project-specific scope and quote.
Select one noncombustible structure and facade system
The structure choice is steel stud or CMU block. The steel-stud path estimates its selected framing profile and related sheathing or finish-support materials. The CMU path estimates masonry units and its related assembly allowances. They are alternate systems, not layers to add together. Do not combine their quantities unless a project professional deliberately designs a hybrid condition.
For steel framing, obtain current corrosion protection, fastener, spacing, track, backing, sheathing, joint, and attachment requirements from the selected system manufacturers and responsible designer. For CMU, resolve footing or slab support, reinforcement, grout, bond, movement, moisture, attachment, and opening details. The calculator supplies planning quantities; it does not verify either assembly for loads, wind, seismic conditions, heat exposure, or local requirements.
Choose stucco, porcelain tile, or stone veneer as the facade path that matches the concept. Each finish needs a compatible substrate, weather management, movement strategy, mortar or adhesive system, edge treatment, and manufacturer instructions. A material label such as “noncombustible” does not make the complete island safe around a specific appliance. Backing, membranes, adhesives, trim, access doors, stored items, nearby construction, and concealed components also matter.
Keep service access and ventilation openings coordinated with the shell. Do not close a cavity based on a generic rendering. The selected appliance documents and the reviewer responsible for the enclosure must define openings, liners or jackets, ventilation, access, and separation from incompatible materials.
Freeze the appliance package from current manufacturer documents
Select exact current models before final openings, countertop fabrication, utility rough-in, or equipment purchase. Download the installation manual, cut sheet, and any listed accessory instructions directly from the manufacturer or authorized source. Record model and revision information. Recheck the documents before ordering because a similar name or replacement model can carry different requirements.
Nominal width is a shopping category, not a cutout dimension. The manufacturer cutout can differ from the product's advertised width and may include flange, trim, ventilation, support, access, or tolerance requirements. Copy the current documented cutout into the project schedule; do not infer it from the calculator's schematic width field.
The same rule applies to an insulated jacket or liner, enclosure ventilation, clearances, countertop support, combustible surroundings, and installation dimensions. The selected appliance's current documents own those values and conditions. If the manual says a jacket depends on enclosure construction, do not replace that decision with a generic “noncombustible island” assumption. Obtain written clarification when instructions conflict or the exact assembly is not covered.
Treat a product substitution as a layout change. A strict SKU or model mismatch is not “close enough.” Reopen the cutout schedule, jacket and vent review, utilities, countertop, access panels, and surrounding-clearance review before accepting the substitute. Keep the calculator line quote/review-only when its product identity is absent or does not match; never let a nearby price silently authorize purchase.
Lay out openings, landing zones, countertop, and overhang support
Build one coordinated elevation for each island face. Place the exact manufacturer cutouts, access openings, doors, drawers, vents, and service panels before drawing seams or finish modules. The calculator's grill, sink, and mini-fridge toggles help reserve schematic openings, but final fabrication must follow the selected documents and fabricator-approved dimensions.
Add working landing zones and circulation without turning them into universal code numbers. Confirm the needed space with the equipment instructions, fabricator, designer, and local authority. Check that lids, doors, drawers, and access panels can fully operate; that hot items do not cross guest seating; and that maintenance components remain removable after the countertop and facade are installed.
Choose granite or quartzite, porcelain slab, concrete, or tile as the planning countertop path. Resolve slab size, seams, edge build-up, finish, substrate, movement, weather exposure, heat compatibility, sink and appliance cutouts, and transport with the fabricator. The calculator estimates surface and opening quantities but does not produce a fabrication template.
An overhang also needs a support decision. The calculator may add a bracket allowance for certain modeled overhang conditions, but that line is not engineering or fabricator approval. Final support depends on the selected material, thickness, span, edge, loads, attachment, island structure, and fabricator rules. Do not order brackets or cut a top from the allowance alone.
Review grill location, combustible surroundings, and covered-roof conditions
Review the grill as a heat- and fire-producing appliance, not merely another rectangle. The U.S. Fire Administration's outdoor fire safety guidance supports outdoor-only use, separation from combustible surroundings, supervision while lit, cleaning, and keeping children and pets away. It is general safety guidance, not a permanent-island clearance table or local installation approval.
Inventory siding, railings, eaves, branches, furniture, stored fuel, fabric, doors, windows, roof structure, and concealed combustible components around the proposed location. Then apply the selected grill's current installation instructions and obtain local review. Do not publish or borrow a generic clearance because appliance construction, fuel, enclosure, hood, roof, and adjacent materials differ.
In the current calculator, a grill under a covered roof is a redesign-required state pending manufacturer venting and hood-clearance review. A grill beside a house wall is also redesign-required pending flashing, cladding, fire-separation, and clearance review. Those signals mean stop and resolve the layout; they are not approvals after adding a hood or changing a finish.
The CPSC's grill safety guidance supports checking the selected grill and gas hoses for damage, checking recalls, and following safety guidance. It does not design a permanent enclosure or gas system. Keep active flame out of planning and construction work, and follow current product instructions for inspection, operation, shutdown, and maintenance.
Hand gas, electrical, water, drainage, and ventilation to the right reviewers
Use the plan to identify utility questions, then hand each system to the qualified party. A licensed gas trade must review fuel type, demand, routing, shutoff, regulator, testing, combustion-air concerns, and appliance connection. A licensed electrical trade must review loads, circuits, disconnects, grounding, bonding, receptacles, lighting, wet-location equipment, and protection. Do not turn the article or calculator into hookup instructions.
Plumbing review must address potable water, backflow or cross-connection controls, drainage, venting, traps, cleanouts, freeze protection, winterization, materials, and service access as applicable. A sink toggle only reserves a planning opening. It does not prove that supply or drainage is available, permitted, protected, or correctly routed.
Ventilation and hood or duct routing belong to the selected appliance documents, hood manufacturer, responsible designer, and local authority. Covered layouts require special attention to exhaust, makeup air, heat, grease, roof or wall penetrations, weather protection, and clearances. Do not assume an outdoor setting eliminates those reviews.
The calculator's utility route distance, surface condition, and appliance package tier are review-only readiness inputs. They can surface trenching, cut-sheet, jacket, ventilation, or fabrication questions, but they do not change BOM quantities, pricing identity, material keys, or preview geometry. A utility review line is a handoff, not a priced installation line or permission to proceed.
Read the calculator BOM without mistaking it for an installed budget
Read every BOM line by status. A priced, shopping-ready line still requires product, package, quantity, compatibility, regional availability, tax, delivery, and current-price verification. An unpriced or mismatched line remains quote/review-only. Do not replace it with a guessed price or assume a similar SKU preserves the selected specification.
The subtotal covers only the materials represented by priced lines in the current planning result. It can be incomplete when other lines are unpriced. It excludes appliances, labor, permits, inspections, utility locating, trenching and hookups, grading, hauling, fabrication templates, contractor overhead and profit, tax, delivery, contingency, and site-specific engineering unless a line explicitly states otherwise. It is not a full installed budget.
Compare quantities to the chosen pad, structure, facade, countertop, openings, and overhang state. If a selection changes, regenerate the BOM rather than manually combining versions. State selection may use regional data where supported; absent or unsupported coverage can retain calculator-default pricing and frost basis with a warning. That fallback is not a local quote or local design decision.
Send the reconciled list to the fabricator, suppliers, and contractors with its exclusions attached. Ask each party to identify owner-furnished items, accessories, consumables, waste, minimum orders, lead times, substitutions, delivery, storage, labor, and scope gaps. Use written quotes as purchasing authority.
Reconcile the plan before purchase, fabrication, permit, and construction
Hold a final review with the site sketch, selected model documents, opening schedule, countertop drawing, utility plan, calculator inputs, BOM, and written quotes side by side. Confirm that the same appliance models appear everywhere. Confirm that the pad and structure paths match the reviewed assembly and that facade, countertop, seams, access, ventilation, and overhang support agree.
Resolve every redesign-required or review-required item. Obtain the applicable utility-locate responses before excavation. Ask the local authority which permits, adopted requirements, inspections, setbacks, fire-safety reviews, and property restrictions apply. Ask licensed trades and the responsible professional to approve only the work within their scope. Do not treat one review as approval of every system.
Before fabrication, have the fabricator verify current cutouts, templates, tolerances, support, seams, edge details, transport, and installation sequence. Before purchase, verify exact model and SKU, included accessories, required jackets or liners, current documents, warranty conditions, availability, and return constraints. Before construction, confirm the latest coordinated drawings are in the field.
Save the reconciled calculator state and share its plan link or report as a planning record. Reopen it when an appliance, finish, site condition, utility route, reviewer decision, quote, or local requirement changes. The safe sequence is define, locate, document, review, coordinate, quote, and then build—not buy equipment first and force the island around it.