Diy Tutorial
DIY Bathroom Remodel Planning: Find the Hidden Work Before Demolition Starts
Plan a bathroom remodel around hidden conditions, wet-area boundaries, trade coordination, ventilation, inspections, and a materials-only takeoff.
BuildListCalc Editorial Team · 14 min · Published August 3, 2026 · Updated August 23, 2026 · Fact checked July 31, 2026
Define the remodel scope before demolition
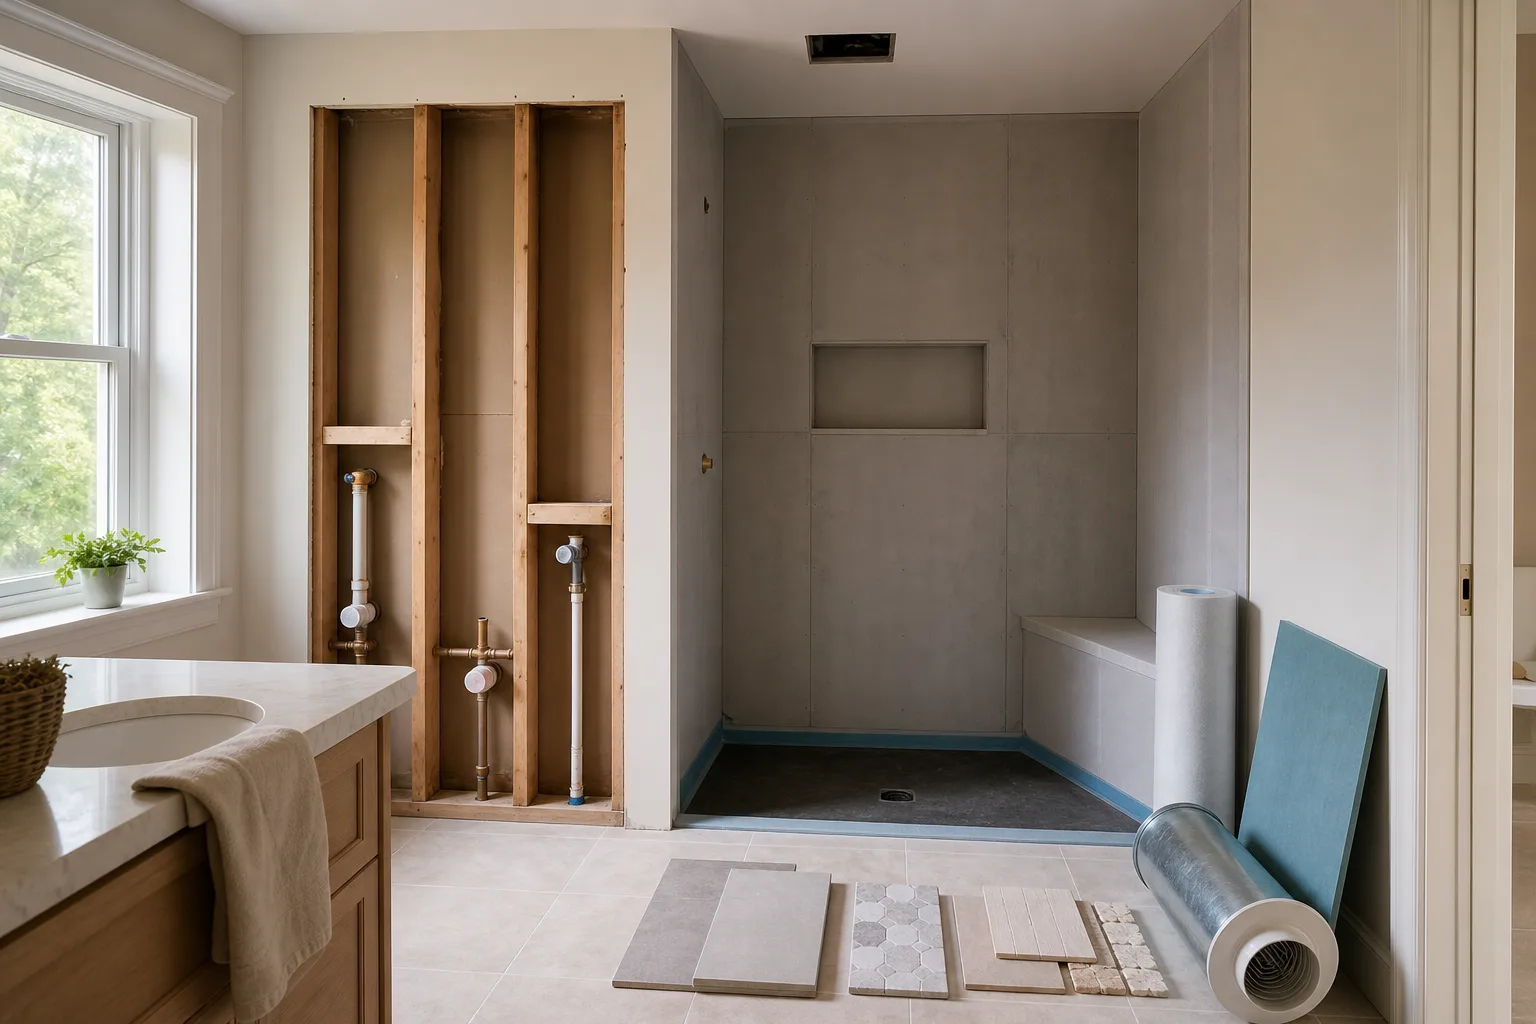
A bathroom remodel gets costly when the finish plan you can see runs ahead of the work you cannot. So start by deciding what is really changing. Is it a surface refresh, a tub or shower replacement, a wet-area conversion, a layout change, or a full room rebuild? Put that choice in writing. Add a simple room sketch, photographs, the fixture list, and a list of walls or floors that may need to open. A new faucet, tile color, or vanity choice does not by itself describe the work behind it. That hidden work includes plumbing, electrical, ventilation, substrate, inspection, and access.
Ask the local building department what applies before you set a demolition date. That means permits, plan information, licensed trades, and inspections. The 2024 International Residential Code exhaust chapter is model-code material. It is not proof of an adopted requirement where you live. A state, county, or city can adopt another edition, amend it, and handle permits differently. Treat the authority having jurisdiction and the accepted plans as the path that controls.
Define what stays in place as carefully as what comes out. Note the room below or beside the bathroom. Note the shower or tub receptor, exterior walls, access panel locations, and occupied areas that need protection. Make a written responsibility list. It should cover owner, general contractor, plumber, electrician, ventilation installer, tile contractor, and glass supplier. It should also say who checks existing conditions, who supplies each product, who schedules inspections, and who owns a change found after walls open.
The Bathroom Remodel Material Calculator helps after that scope talk. It builds a planning takeoff for floor finish, direct shower or tub surround materials, and dry-zone board and paint. It also covers limited plumbing-wall framing, a fan allowance, and related fastener or insulation rows. It is not a permit drawing, a full fixture package, a sanitary rough-in design, or an installed-price quote. Use it to ask better questions before you order. Do not use it in place of field checks.
Check the room, structure, and hidden conditions
Document the existing room before demolition. Photograph walls, ceilings, floor transitions, plumbing access, windows, exhaust grilles, and visible staining. Measure the room and the direct shower or tub surround separately. Write down where the fixtures sit now. Also record door swing, ceiling changes, and any condition that might limit access. A plan that fits on paper can still clash with framing, a drain route, a duct, a stack, or the room next door.
Do not turn demolition into a hunt for surprises. Where conditions are unknown, price and schedule a way to investigate. Moisture damage, rot, mold-like growth, loose tile, a soft floor, and deteriorated sheathing are decision points. So are leaking supply or drain piping and unplanned framing changes. They are not a reason to quietly add material or push on with a finish schedule. Pause, document the condition, and get the right trade or design review before you cover it.
Older homes need their own health-and-safety screen. EPA states that renovation in a pre-1978 home with lead-based paint can create hazardous lead dust. It recommends that homeowners planning such work use a lead-safe certified contractor. The agency's current RRP program guidance and its March 2026 lead-safe renovation steps give the governing federal context. Whether a given owner project is regulated can depend on occupancy and other facts. Do not assume that a homeowner exception makes the exposure risk go away.
EPA also says a person cannot spot asbestos by looking at a material. If suspect material may be disturbed, the agency recommends sampling by a properly trained and accredited asbestos professional. It also recommends analysis by a qualified laboratory. Read EPA's remodeling and asbestos guidance before you disturb old floor tile, ceiling material, pipe wrap, or similar legacy material. This is a stop-and-refer line, not a sampling or removal tutorial.
Separate dry-area work from the wet-area system
Treat the shower or tub surround as a contained system with a defined splash boundary. The surrounding vanity wall, the toilet-side wall, and most of the room are dry-area finishes. That holds unless they truly fall inside that boundary. The split affects your materials, your sequencing, and the questions you ask a contractor. It also keeps you from buying wet-area backer and membrane for walls that are not part of the shower or tub assembly.
The Bathroom Remodel Material Calculator uses the same split. Its direct shower or tub surround follows the wet-wall path. Dry-zone board and paint stay separate. A door or window outside the surround belongs to the dry-side opening path. A niche, window, or other opening inside the surround needs a wet-area detail that is verified on its own. The calculator's material list is a planning calculation. So measure the real splash shell before you rely on its quantity.
Do not assume a cementitious board alone describes a complete water-management system. The same goes for a familiar coating or a tile surface. A given backer, membrane, seam treatment, drain connection, receptor, curb, and transition may be designed to work together. The required sequence and compatible accessories come from the exact system manufacturer and the accepted local path. The waterproofing may not be a named, complete system with current documents and a responsible installer. In that case, keep it in review rather than filling the gap with a generic recipe.
This split also makes the scope clearer. You can plan dry-area painting and board finishing as finish work. Wet-area assembly asks for more. Settle product compatibility, substrate condition, penetrations, transitions, and water-management responsibility before close-in. The room may look like one finish palette. It is not one interchangeable assembly.
Plan plumbing changes before closing walls
Mark every fixture that stays, moves, or changes type. Give the plumber the existing and proposed layout. Add fixture cut sheets when selected, accessible dimensions, and the intended shower or tub system. Confirm where supply lines, drains, vents, shutoffs, and service access are expected. Do that before framing or board closes the wall. A layout change can affect more than the fixture centerline. It may also affect drain routing, venting, framing, floor repair, and the permit or inspection path.
Keep product choice separate from rough-in approval. A toilet, faucet, shower valve, vanity, receptor, or drain may have its own manufacturer requirements. Each may also have its own local plumbing review. Do not lock a rough-in location from a showroom drawing or a generic clearance graphic. The licensed plumbing professional and local reviewer need the actual conditions, the selected products, and the rules that apply.
The calculator may include a limited framing allowance for a dedicated plumbing wall. It does not price sanitary rough-in, vent routing, fixtures, valves, drains, or plumbing labor. Its visual layouts are planning aids, not plumbing approval. An opening may reveal a damaged pipe, altered framing, or an unexpected vent path. If so, update the scope and get a quote or direction before you go back to the takeoff.
Keep the shower system responsibility in plain view here. A site-built pan, prefabricated receptor, curbless entry, or linear-drain concept may change trade coordination. It may also change manufacturer compatibility. It does not add an approved drain tie-in, curb, flood-test outcome, or warranty path to a material list on its own. Put those decisions in the plumbing and tile handoff. Name the party responsible for each one.
Keep electrical work on the permitted trade path
Bathrooms pack lighting, switches, fans, heaters, receptacles, and wet locations into a small area. That is exactly why the electrical scope needs a licensed, permitted path where local rules require one. Describe the use you want: a quiet fan, lighting locations, mirror lighting, receptacle locations, a heated accessory, a control preference, or a combination unit. Do not direct anyone to work on an energized circuit.
Have the electrician confirm circuit capacity, required protection, box locations, and equipment listing. Have them confirm control method, accessibility, and the local permit/inspection route too. A fan-and-light or fan-and-heater product is not merely a fixture swap. It can change the electrical load, switching, mounting, and coordination with the ventilation path. Do not let a tile schedule force a wiring decision after the wall is closed.
The calculator's fan row is narrow on purpose. It is a fan allowance only. It excludes duct, exterior cap or other termination component, switch, wiring, branch-circuit work, and the approved electrical path. It also excludes labor and permit cost. Keep those items as trade quotes and review tasks. A fan line item is not a complete ventilation installation.
Gas work is outside this article. It should stay on its own licensed, permitted, manufacturer-directed path. Do not add a gas appliance, alter a fuel connection, or plan combustion-air decisions from a bathroom finish checklist.
Size ventilation and plan the exhaust route
Ventilation is a room-performance and moisture-management question. It is not simply a fan purchase. First find out whether the local path requires mechanical exhaust, permits, or a certain termination arrangement. Then have the responsible installer plan the complete route. That route covers fan location, duct path, exterior termination, controls, access, and roof or wall penetration. It also covers coordination with framing and insulation. The locally adopted code and the product instructions control. An IRC model-code page is not a field installation detail.
To compare products, look at ENERGY STAR's ventilation fan criteria. They distinguish certified performance, efficacy, sound, and installed fan performance. Those ratings can help you compare listed products. They do not select the correct fan or validate a given duct run. The unit you choose still has to suit the room, the route, local requirements, and manufacturer instructions.
Put the duct and termination on the early coordination drawing. Do not leave them as a late ceiling detail. An unplanned route can collide with framing, insulation, plumbing, or a roof assembly. Ask the installer what must remain visible for inspection. Ask which product documents belong with the permit record. The contractor should also confirm whether a combination unit changes electrical coordination.
The important distinction is simple. The fan is equipment. The exhaust path is a system. A material takeoff can flag the equipment. It cannot certify the route, termination, controls, or installation. Leave that conclusion to the trade that applies and the local authority.
Coordinate substrate, waterproofing, tile, and transitions
Start the finish talk with the existing substrate and the finished elevations at the doorway, shower entry, and adjacent room. Tile, underlayment, setting materials, trim, and transitions must fit the actual floor and wall conditions. A planning allowance does not confirm that a slab is flat, a wood floor is ready, or a subfloor is sound. It does not confirm that an existing receptor is compatible with a new wall system.
Choose a named shower system before you order its parts. The Schluter shower-system installation handbook is manufacturer instruction for that company's system. It is not a universal waterproofing recipe. It is not a substitute for local requirements. If you select that system, use the current handbook, compatible components, and the sequence the manufacturer sets. If you select another system, follow that system's current instructions instead.
Coordinate with the installer on the exact boundary between wet wall, dry wall, shower receptor, floor underlayment, tile, movement joints, sealant locations, and trim. Penetrations, niches, windows, curb or entry transitions, and outside corners are not generic material categories. They are detail locations. Confirm each one with the selected system and the qualified installer before you cover the assembly.
The calculator can help you separate floor tile, a selected underlayment path, and direct wet-wall backer and membrane allowances. It can also separate tile, setting materials, grout, and caulk. It does not select a manufacturer-specific coverage table. It does not certify substrate preparation. Do not mix components from different systems just because their names sound alike. Keep receipts, batch information when useful, cut sheets, and installation documents with the job file.
Sequence inspections, close-in work, and finishes
Write the sequence before you remove the first finish. A practical planning sequence starts with permits and trade scheduling. Next come protected demolition and documented investigation. Then come approved repairs and rough trade work. The local authority may require inspections while plumbing, electrical, framing, or other work remains visible. Ask the authority and each trade what must be ready, accessible, and documented at each stage.
Do not schedule board, waterproofing, tile, or trim to make the room look ready for an inspection. Cover work only after the responsible party confirms that the preceding condition is accepted. A failed inspection, product incompatibility, failed test, or hidden-condition discovery should send the project back to its decision point. The next layer must not disguise it.
Keep a short change log. For every surprise, record the date, location, photo reference, and who reviewed it. Record the decision, quote effect, permit effect, and which drawings or material lists changed. This helps most when the owner buys materials and several trades are involved. It keeps a change to a drain, wall, fan route, or receptor from slipping past the next contractor.
Before finish installation, match actual field dimensions against the selected products. Check delivery condition, lead time, approved substitutions, storage needs, and the installer’s current documents. Finish work goes smoother when the handoff is spelled out. Confirm all four items before it starts. The rough work is complete. Required reviews are resolved. The substrate is accepted for the selected system. Someone owns any remaining transition.
Build a material list without hiding labor and soft costs
Use the Bathroom Remodel Material Calculator after scope, measurements, and the wet-area boundary are reasonably stable. Enter the room dimensions, direct shower or tub surround, and opening information as planning inputs. Enter the wet backer path, floor path, plumbing-wall condition, fan allowance, and region as well. Review the schematic and notes before the subtotal. The visual wet zone, dry-zone openings, or plumbing-wall assumption may differ from the field notes. If so, correct the input or stop for review.
Read the result by assembly. The useful materials-only rows can include floor finish materials, direct wet-wall finish materials, and dry-zone board and paint. They can also include selected framing allowances and a fan allowance. The subtotal is not an installed remodel price. It does not make fixtures, vanity, countertop, shower glass, trim, or hardware disappear. It does not make rough plumbing, ductwork, termination, switch, or wiring disappear. It does not make trade labor, demolition, permits, inspections, or tax disappear. And it does not make delivery, contractor overhead, profit, contingency, or hidden-condition remediation disappear.
Use quote-first allowances for the excluded work. Ask suppliers and trades for their units, lead times, exclusions, and change-order assumptions. Ask about delivery rules and responsibility for damage or missing accessories. Compare quotes against the same written scope. A lower labor number may omit disposal, protection, a drain component, a transition, or a permit. It may also omit the investigation allowance that another quote included.
Water-saving fixtures deserve a product check, not an assumed savings claim. EPA says WaterSense labeled products meet the program's efficiency and performance specifications through independent certification. The eligible bathroom categories include lavatory faucets, showerheads, and toilets. Confirm the exact product, local plumbing requirements, compatibility, and user needs with the trade before you buy. The label is not a substitute for rough-in, drain, pressure, or installation review.
Keep the materials subtotal beside a separate installed-budget worksheet. Include quote-first work and an explicit contingency decision. Do not silently fold those amounts into a shoppable BOM. That split keeps the planning list more honest. It also makes a change in scope visible instead of hiding it behind a single remodel total.
Final handoff checklist before demolition starts
Before demolition, gather the current scope sheet, room measurements, photographs, and selected product documents. Gather the material takeoff, trade quotes, permit correspondence, and inspection plan. Then confirm the room is protected and occupants understand the disruption. Confirm who owns the water and power shutoff. Confirm the work area can be secured without blocking required exits.
- Confirm whether the work is a refresh, replacement, conversion, or layout change. Record every affected fixture and wall.
- Confirm local permit, licensing, inspection, and adopted-code requirements with the authority having jurisdiction. Do not use a model-code reference in place of local confirmation.
- Confirm lead and asbestos screening decisions for older materials before you disturb them. Use qualified professionals where EPA guidance calls for them.
- Confirm the actual shower or tub splash boundary, the dry-area boundary, and the substrate condition. Confirm each opening or penetration inside the wet-area system.
- Confirm plumbing rough-in, electrical scope, fan route, termination, controls, and any combination unit with the responsible licensed trades.
- Confirm the exact named waterproofing system, compatible components, and current manufacturer documents. Confirm who is responsible for transitions, drain connection, and testing.
- Confirm which work must remain visible for inspection. Confirm who is authorized to approve close-in before board and finish layers conceal it.
- Reconcile the BuildListCalc materials-only list with field measurements and current supplier packaging. Keep fixtures, glass, MEP work, labor, permits, delivery, and contingency as separate quote-first or review items.
If any of these answers is missing, put off the step you cannot undo. Do not improvise it during demolition. The goal is not to turn a material list into permission to build. The goal is a documented handoff. In it, the local requirements, hidden-condition plan, trade responsibilities, selected product system, inspection sequence, and finish takeoff all agree.