Diy Tutorial
How to Build a Backyard Shed: Site, Foundation, Framing, Roofing, and Materials
Plan and build a backyard shed from site and permit checks through the foundation, floor, walls, roof, weatherproofing, and material delivery.
BuildListCalc Editorial Team · 15 min · Published August 3, 2026 · Updated August 23, 2026 · Fact checked July 31, 2026
Check setbacks, easements, utilities, and permit rules
A shed is small enough to look simple and permanent enough to create real site problems. Start with the property, not the lumber aisle. Find the recorded property lines, then identify easements, drainage paths, septic parts, wells, retaining walls, overhead service, large roots, and access for delivery. A fence, hedge, or mowing line may not be the legal boundary.
Call the building or planning office that serves the property. Ask about zoning setbacks, height and lot-coverage limits, permit triggers, fire-separation rules near a property line, required drawings, inspections, and whether a slab or other foundation changes the review path. Also ask which code edition and local amendments are in force. The 2024 International Residential Code scope material includes accessory structures, but it is a model code designed for adoption. It does not become your local rule merely because it is current.
Permit exemptions are especially easy to misuse. Seattle's current shed guidance gives a local permit exception when a shed meets several conditions, including a roof footprint of 120 square feet or less. That number is a Seattle example, not a national threshold. Even an exempt shed can still be controlled by zoning, easements, environmental areas, use, utilities, and other local rules.
Before any excavation, contact 811 Before You Dig or the state center's online service. Give the actual dig area, keep the ticket information, wait the locally required time, and confirm that all notified utilities have responded. Marked lines show an approximate location, not a free digging lane. Compare the responses with available property records, and ask the state center how to handle any buried line or facility not covered by the ticket.
Write these answers on the site sketch. A supplier plan, internet tutorial, or material estimate does not grant permission to build.
Pick a dry site and a foundation strategy
The best-looking corner of the yard is not always the best building site. Watch where water goes during rain. Avoid a low pocket, runoff from a downspout, the bottom of a slope, and soil that stays soft. The finished site should move surface water away from the shed without sending it toward a neighbor or house. Preserve any drainage route the local plan requires.
Strip vegetation and organic topsoil only within the approved work area. Do not bury roots, sod, or loose debris under a support. If excavation exposes fill, buried trash, standing water, expansive soil, large roots, or an old foundation, pause. Those conditions can change the foundation decision.
A framed floor on skids can work for some detached storage sheds. A slab can work where the use, soil, drainage, frost conditions, and local details support it. Other sites may need piers, frost-protected work, anchors, or a designed foundation. None of these is automatically the right answer everywhere. Climate, wind, snow, soil, slope, flood exposure, shed use, and the locally accepted path all matter.
The 2024 IRC foundation chapter is a useful model-code checklist because it addresses surface drainage, questionable soils, frost protection, and foundation anchorage in one place. Do not lift its prescriptive dimensions into an unverified shed plan. First confirm which edition, exceptions, amendments, and foundation path the local authority accepts for this structure.
For a skid-floor path, think in layers: prepared drainage base if required, stable supports, treated or otherwise approved ground-near members, a square floor frame, and a protected subfloor. Confirm how the shed resists sliding, overturning, and uplift. A portable-sounding foundation name does not make anchorage optional.
For a slab path, resolve excavation, base preparation, drainage, reinforcement, thickened edges or other support details, moisture control, anchor layout, door threshold, and curing before concrete arrives. Do not let a generic shed drawing decide frost depth, slab edge design, or anchor spacing.
Set a benchmark for finished floor height. Check door access, splash-back, siding clearance, and the path for moving equipment into the shed. A dry site and a deliberate elevation are cheaper than repairing a floor that stays wet.
Build and square the floor platform
Treat the floor as the layout table for everything above it. If it is out of square, the walls, roof, siding, and doors will inherit the error.
Start from control lines that match the approved site sketch. Set supports at the required elevations and bearing points. Confirm that skids, piers, or slab edges are where the framing plan expects them, not merely where excavation was easiest. Recheck the overall length, width, diagonals, and level before fastening the platform.
Select floor joists and subfloor panels from an accepted design for the shed's use. A garden-tool shed, woodworking shop, and equipment shed do not carry the same loads. Heavy rolling equipment, dense storage racks, masonry, or a future loft can take a light prescriptive floor outside its intended scope. Do not choose joists by matching the nominal size in a photo.
Frame the rim and joists on a flat surface when practical. Keep crowns consistent, provide full bearing, and install blocking or connectors where the design calls for them. Use fasteners approved for the member treatment and exposure. Ordinary interior screws are not framing connectors.
Before laying panels, check the panel stamp, span rating, face orientation, and the current instructions for the exact product. APA's builder tips explain that panel selection depends on load, support spacing, finish, and floor system. APA also treats joint spacing as a recommendation to manage moisture movement while noting that a manufacturer may give different instructions. Follow the accepted plan and the panel maker rather than turning one general tip into a universal field rule.
Stagger joints and support panel edges as required. Keep the framing surface clean and flat, apply construction adhesive only when the floor system calls for it, and complete fastening before the adhesive skins. Protect panel edges from rain during the work. Then snap the wall lines and check the platform diagonals again.
Frame walls, openings, and top plates
Lay out each wall from the squared platform. Mark corners, intersecting walls, doors, windows, studs, hold-down or anchor points, and any blocking needed for shelves or exterior fixtures. Coordinate the layout with the actual door and window rough-opening instructions before cutting.
Openings change the wall load path. The header, jack or trimmer studs, king studs, sill, and cripple layout must fit the opening, wall height, roof load, and locally accepted framing path. Do not copy a header from a shed of a different width or snow region. Wide doors can also leave little solid wall near a corner, which may trigger a different bracing or engineered solution.
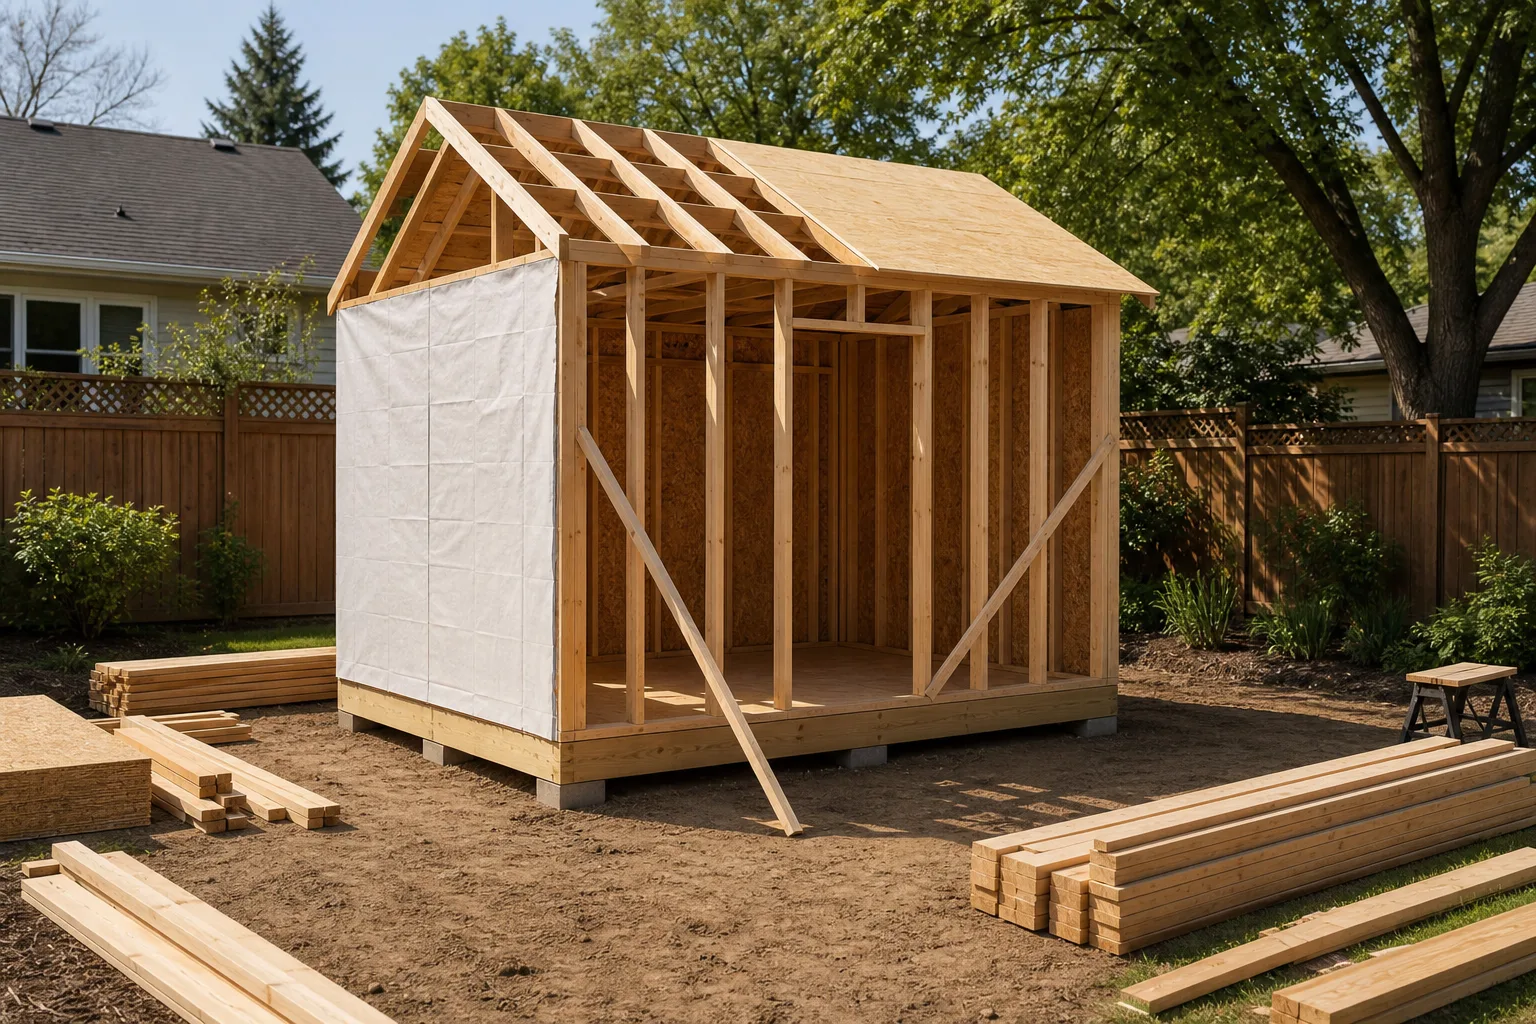
Build walls on the deck only if the platform is flat, clean, and strong enough for assembly. Sight the plates and studs. Reject badly damaged pieces and place crowns consistently. Install framing fasteners as specified; toenails, structural screws, straps, and anchors are not interchangeable merely because they connect the same two pieces of wood.
Plan the raising sequence before lifting. Clear the area, brace the first wall immediately, and keep people out of the fall zone. Large or tall wall sections may need more workers, temporary lifting equipment, or smaller assembly sections. Never leave a newly raised wall standing on a few nails without bracing.
Plumb and brace the walls, then check corner-to-corner dimensions at the top. Join corners and top plates according to the framing plan. Keep required plate laps, connectors, and load-path components visible for inspection. A wall can look straight while its top is racked enough to make roof framing difficult.
Finally, compare every rough opening with the ordered unit and flashing method. Correct framing now, before sheathing locks the walls and before a door delivery exposes a costly mismatch.
Set the roof shape and framing path
Choose the roof as a structural and water-shedding system, not just a style. A gable roof has a ridge and two drainage planes. A lean-to roof has one plane and places different demands on the high wall, low wall, and side flashing or clearance. Both must handle local dead, snow, wind, and uplift loads.
Decide whether the accepted plan uses site-built rafters, manufactured trusses, or another system. Manufactured trusses require the truss drawings, correct bearing, bracing, handling, and connector details. Do not cut or drill a truss without written direction from the responsible design source. Site-built rafters require verified span, species, grade, spacing, ridge or beam condition, ties, overhangs, and connections.
Lay out every bearing point before lifting roof members. Check the building width at the plates, wall plumb, ridge alignment, and the location of doors or equipment that could interfere with temporary bracing. Use a safe access and fall-protection plan suited to the work; a shed roof is still high enough for a serious fall.
Set the first members plumb and brace them. Use a consistent layout reference so roof sheathing edges land on support. Install outlookers, blocking, fascia backing, gable framing, and opening curbs only where the accepted detail requires them. Keep the eave and rake lines straight because later trim will show every framing wave.
The roof-to-wall connection is part of the continuous load path. FEMA's windstorm-resilience guidance explains the load path from roof sheathing through framing, walls, and the foundation, while tying connector selection to the loads. Use that as a safety concept, not a connector schedule for a particular shed. Connector type and schedule depend on wind exposure, roof geometry, framing, wall anchorage, and the locally accepted design. A takeoff allowance for uplift ties is not an anchorage design.
This tutorial follows an asphalt-shingle roof as its main installation path. If you choose metal panels or another covering, use that system's current minimum slope, underlayment, clip or fastener, trim, expansion, and flashing instructions instead of reusing shingle details.
Sheathe and dry in the shell
Wall and roof sheathing help tie the shell together, but only when the correct panels, orientation, edge support, and fasteners match the plan. Read the grade stamp before installation. Keep damaged or swollen edges out of critical joints, and do not assume every panel labeled for construction has the same exposure rating or structural use.
Start wall panels from a controlled corner. Confirm whether the long dimension or strength axis, horizontal joints, blocking, and corner overlap match the accepted bracing detail. Tack-and-fix-later habits can leave missing edge fasteners after weather barrier covers the work. Complete and inspect each panel while the edges are visible.
For the roof, APA's roof sheathing guidance is a useful technical reference for panel support, spacing, fastening, and dry-in practices. It is not a replacement for the panel stamp, manufacturer literature, local wind requirements, or the approved framing plan. Lay panels from safe staging, stand over supported areas, and keep rows straight. Use roof clips or blocking only where the design requires them.
Do not publish one nail pattern for every shed. Fastener type, penetration, edge distance, and spacing can change with panel thickness, framing, wind zone, diaphragm requirements, and local amendments. Mark the required schedule on the plan and check it before covering the work.
Dry in the roof as soon as practical with the underlayment or roof-deck protection accepted for the shingle system and climate. Let wet sheathing dry before trapping it below roofing. Wrap walls with the specified water-resistive barrier, lapping it to drain outward. Integrate window and door flashing with that layer rather than sealing the perimeter as an isolated bead of caulk.
At the end of the day, cover open wall tops and vulnerable materials without trapping moisture. A tarp helps manage weather; it does not turn incomplete flashing into a finished enclosure.
Install roofing, siding, trim, and flashing
Finish the exterior in water-shedding order. Roof-edge metal, leak-barrier locations, underlayment, starter course, shingles, ridge treatment, and penetrations must work as one system. The GAF steep-slope field guide shows how one manufacturer coordinates roof-deck protection, drip edge, shingles, ventilation, and flashing. Those are GAF system instructions, not universal dimensions or warranty terms for every brand.
Use the current instructions packaged with the exact shingles. Confirm the roof slope is within their allowed application, the deck is acceptable, and local ice-barrier or wind provisions are addressed. Keep underlayment flat. Place drip edge, starter, field shingles, ridge material, and fasteners in the sequence required for that product and local conditions. Do not bury a low-slope problem under extra roofing cement.
Plan roof-to-wall, door, window, and horizontal trim flashing before siding. Each upper layer should drain over the layer below. Head flashing needs a path out over the cladding; sill and jamb flashing need to integrate with the wall barrier. Sealant is a maintenance joint, not a substitute for shingle-style laps.
Siding rules vary widely. Panel siding, lap products, vinyl, and fiber cement have different clearances, joint treatment, fasteners, starter details, cutting precautions, paint timing, and movement rules. Follow the current manufacturer instructions for the chosen product. Seal or finish field cuts when required and keep cladding away from soil, standing water, and roof runoff.
Install corner boards, fascia, soffit, and door trim without blocking drainage or ventilation. Prime and paint compatible products within the manufacturer's exposure window. Then hose-test only where the product maker or building professional considers it appropriate; do not blast water uphill behind laps.
Plan ventilation, anchorage, and access
Ventilation depends on how the shed will be used and built. A simple unconditioned storage shed has different moisture sources than a heated workshop. Wet lawn equipment, firewood, fuel containers, batteries, and frequent human use also change the problem. Ask the local reviewer whether the planned use affects ventilation, energy, electrical, fire, or occupancy requirements.
Provide a deliberate path for air rather than random holes that admit rain, insects, or wind-driven snow. Coordinate intake and exhaust openings with insulation, roof framing, soffits, ridge details, and the roofing system. Keep vents from being blocked by stored boxes. If the shed will be insulated or conditioned, obtain a climate-appropriate wall and roof assembly; adding interior foam or plastic without a moisture plan can trap water.
Anchorage must connect the roof to walls, walls to floor or slab, and the base to the ground through a continuous load path. Skids sitting on blocks are not automatically secure against sliding or overturning. A slab anchor pattern from a different wind region is not automatically adequate. Confirm anchors, straps, connectors, fasteners, corrosion protection, edge distances, and installation sequence with the accepted design and product literature.
Plan access around the real equipment. Check door swing, threshold height, ramp slope and support, landing, locks, and clear aisle space. A ramp for a mower or heavy tool needs stable bearing and a safe transition; it should not rest on loose soil or direct runoff into the doorway. Keep fuel-burning equipment and hazardous materials within their product and fire-safety rules.
Electrical work is outside a basic shell takeoff. If power is planned, use the permit and licensed-trade path required locally. Do not run an extension cord as permanent wiring or close walls before required inspections.
Build the material list and delivery sequence
Once the site decision and accepted framing path are stable, use the BuildListCalc Shed Material Calculator to organize a planning takeoff. Enter the measured rectangular length, width, wall height, foundation path, floor framing, openings, roof style and pitch, sheathing, cladding, overhangs, roofing, hardware options, and pricing region that match the current plan.
Read the planning model before the subtotal. Confirm the footprint, floor path, wall openings, roof shape, and active assemblies. The tool can organize foundation or floor materials, wall framing, opening framing, roof framing and covering, cladding, weather barrier, and fastener or hardware allowances. Its quantities are directional planning output, not a permit drawing, engineered member schedule, verified foundation, anchorage design, or supplier order.
For this tutorial, keep the roof review on the asphalt-shingle path. The current calculator may expose other covering options, but a material row does not provide a complete manufacturer-specific installation method. Reconcile the selected roof with the exact product instructions before purchase.
Review the list assembly by assembly. Separate installed quantity from purchase quantity, waste, stock length, package rounding, allowance rows, and estimate-only lines. Confirm the exact panel grades, lumber species and treatment, connector models, compatible fasteners, door and window units, siding accessories, roofing system parts, coatings, tax, delivery, and local availability.
Sequence delivery so materials stay usable. Site and base materials come before the floor. Framing can arrive for the platform and shell, but keep panels and finish products raised, covered, and ventilated. Order doors and windows early enough to verify rough openings. Keep shingles, siding, and trim within the storage limits in their instructions. Avoid burying the next needed material under a full-yard drop.
Update the takeoff whenever the permit comments, field dimensions, foundation, openings, framing, or product choices change. A clean list from an old plan is still the wrong list.
Final weatherproofing and inspection checklist
Before calling the shell complete, walk it in rain-shedding order from the roof ridge to the ground.
- Confirm the shed location, use, setbacks, easements, utility responses, permit status, and inspection record with the local authority.
- Confirm drainage moves away from the foundation and door without eroding a neighbor's property or trapping water below the floor.
- Confirm supports, floor framing, wall framing, roof framing, sheathing, and anchors match the accepted plan and remain free of unapproved cuts or substitutions.
- Confirm the continuous load path includes the specified connectors and fasteners from roof to foundation.
- Confirm roof underlayment, edge metal, shingles, ridge, penetrations, and flashing follow the current roofing-system instructions.
- Confirm the wall barrier, opening flashing, siding, trim, clearances, and sealant joints drain outward and meet the cladding instructions.
- Confirm doors and windows operate, latch, and remain square; confirm the threshold and any ramp are stable and shed water.
- Confirm vents are open, screened as appropriate, and coordinated with the actual use and insulation plan.
- Confirm exposed cuts and finishes have the required treatment, primer, paint, or seal, and remove roof or siding debris that can stain.
- Reconcile the final field work with the BuildListCalc material list, supplier receipts, approved changes, and any remaining inspection items.
Do not cover work that the inspector, engineer, or product representative still needs to see. Keep photos and receipts as project records where allowed, but do not treat them as a substitute for an inspection.
A good shed stays boring after the build: doors keep working, water leaves the site, the roof and flashing shed weather, and the structure stays tied to its supports. Recheck it after the first hard rain and after the first severe wind or snow event. Correct small drainage, sealant, finish, and hardware issues before they become rot or movement.